DIY: Velvet Throw Pillows +Giveaway!
I’m 10 years in to marriage, and so far I think I’ve figured out that it’s mainly me trying to incorporate more throw pillows onto our bed and into our lives while my husband discreetly tries to get rid of them.
Me: Why does our house always seem so… messy? And cluttered? I pick it up it EVERY NIGHT. And you and the kids aren’t even home during the day. This is a mystery to me.
Noah: (confidently) it’s all the pillows.
Me:…
Noah:…
Me: I’m pretty sure it’s the 14 socks, 3 pairs of pants, and 400 pieces of toys on the floor that I can see just from where I’m standing right now. And why are there 3 backpacks on the island? We only have 2 children.
Noah: the pillows are a problem.
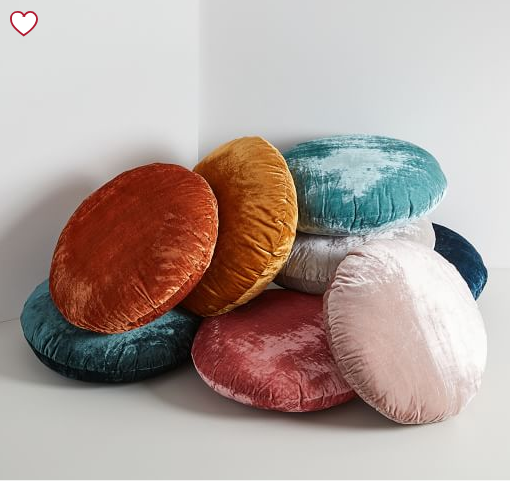
So imagine my delight when I saw these beauties online at West Elm. I knew immediately what my next project would be! I’ve been having a love affair with velvet since… oh, 1998. I vividly remember a velvet turtleneck dress I convinced my mom to sew me in middle school in the flattering shades of pink and blue. I looked like a giant bag of cotton candy, but damn it if I didn’t rock that thing.
Mom- I know you’re reading this. Do you have a photo of me in that masterpiece? Please advise.
These are a breeze to make- I made 4 in less than an hour- and are perfect for Fall. In fact, the only thing that’s easier is winning the ones I made by sharing this post on Facebook or tagging 3 friends on Instagram. I’ll even let you pick the color, and send you a matching set.
You’ll Need:
1/2 yard velvet- should make 2 small (~12” round) pillows
tlo pro-tip: If you’re into Goodwill like I am, you can find big shirts, dresses, and skirts made out of velvet for very cheap quite often. Old, large track suits are the gift that keeps on giving. #washonhot
Thread in same color as fabric
Needle
Sewing machine (you could do this by hand with needle + thread, but it would take a while)
Poly-fil stuffing
Writing utensil (I used a Sharpie)
Required Skills:
Very basic sewing skills
Very basic tracing and cutting skills
SO MUCH FABRIC! SO MUCH POTENTIAL! I shall make you into little teal pillows and love them forever.
Directions:
Wash and dry fabric (otherwise, it may shrink if you ever wash the pillow down the road). This step is very critical if you got your fabric at Goodwill. I repeat: V. CRITICAL.
Fold fabric in half with right sides together (if you’re making 2 pillows, fold in half twice). Trace around something round that is just slightly larger than you want to pillow to end up. Some ideas are:
Mixing bowl
Bundt pan
Plate
Bucket
Trash can
Cut out along traced line through all layers of fabric.
If you’re new to sewing or you’re worried the circles won’t stay aligned, pin them together. I walk on the wild side, so I prefer to wing it and curse myself later.
Sew pieces together WITH RIGHT SIDES TOGETHER (so it’s inside out as you’re sewing). Stich anywhere from 1/4” to 1/2” from edge of fabric. Stop sewing when there is a gap just big enough for your hand to fit through (~4”).
Pull right side of pillow through hole. Using eraser end of pencil (or something like that), reach inside pillow and run pencil along the seam to push the fabric out and define the edge.
Stuff pillow with filling. You can make it really full or less full- totally your preference!
Using needle and thread, carefully stitch closed the remaining hole.
BONUS STEP: If you like the look of a tufted pillow, you can add a button in the middle! You can buy these button kits at any craft store (mine are from Hobby Lobby). You use a scrap of left over fabric to cover the button and then attach with needle and thread to the middle of the pillow. You can even make 2 buttons and sew them together with one on each side.
Cost
Total = $4 per pillow vs. $39 at West Elm
Fabric- was 30% off for a total of $4 per 2 pillows
Stuffing was $4 for 2 pillows
Had everything else
Video Tutorials
You’re welcome for this face:
Intro
Cut out circles
Sew circles together
Stuff and sew closed
Oops! Forgot tying off and hiding thread tail.
Testimonials:
“2 thumbs up! Perfect for drilling my brother!” - Theo and Max
“I hate pillows. Will you come help me load an AC unit into the back of my truck?” - Noah
Hope you enjoy these little cuties as much as I do! Let me know if you need any help!
Toodles, tlo


